Mastering Boost Gauges: DIY Installation Guide
Installing a boost pressure gauge is a must for any car enthusiast when it comes to improving the performance of a vehicle. The gauge allows you to monitor the pressure in the turbocharger, which helps you achieve optimal performance and prevent possible engine damage. We’ll provide you with a step-by-step guide so you can get the most out of your turbocharged car.
Boost Gauge Installation: Why It Matters
Before delving into the installation process, let’s explore why fitting a boost pressure sensor is essential for enhancing your car’s performance and longevity.
- Performance Optimization: A boost pressure gauge serves as a window into your turbocharger’s performance realm. By monitoring boost pressure in real-time, you can make on-the-fly adjustments to your engine’s settings, ensuring it operates at peak efficiency. This can lead to better acceleration, improved throttle response, and an overall enhanced driving experience.
- Engine Health: Excessive or insufficient boost pressure can both spell trouble for your engine. A boost pressure sensor helps keep your engine within its safe operating range, preventing potential damage and promoting engine longevity.
- Tuning and Customization: For automotive enthusiasts who love tinkering with their cars, a boost pressure sensor is an invaluable tool. It allows for precise tuning of your turbocharging system, customizing it to suit your specific needs and preferences. Whether you’re into racing or simply looking to improve fuel economy, a boost pressure sensor is your key to fine-tuning.
Now that we’ve grasped the significance of a boost pressure sensor, let’s proceed with the installation process.
Boost Gauge Installation: Step-by-Step Guide
Installing a supercharger sensor is a relatively simple process that can have a significant impact on vehicle performance and engine health. By following this step-by-step guide, you will not only improve your driving experience, but also ensure optimal turbocharged engine performance.
Before you begin the installation, make sure you have all the necessary tools and materials on hand. Here’s what you’ll need:
- A boost pressure kit (includes gauge, tubing and fittings);
- Screwdrivers;
- A set of wrenches;
- Wire stripping and crimping tools;
- Drill and drill bits;
- Teflon tape;
- Vacuum Tee;
- Wire connectors;
- Wire loop;
- Electrical tape.
Let’s get started:
Step 1: Choosing the Installation Location
Selecting the right spot for installing the boost pressure sensor is crucial. It should be easily visible while driving but not obstruct your view of the road. Typically, it’s placed on the A-pillar or the top of the dashboard. Ensure that the chosen spot is structurally sound and can securely hold the sensor.
Step 2: Installing the Boost Pressure Sensor
Now it’s time to install the boost pressure sensor. Follow these steps:
- Use a screwdriver to remove any panels or trim pieces that might interfere with your chosen location.
- Install the sensor bracket at the chosen spot and secure it using screws or adhesive, depending on the provided mounting method.
Step 3: Attaching the Boost Line
Next, you’ll need to attach the boost line. This tube connects the boost pressure sensor to the vacuum source in your engine. Here’s what to do:
- Locate the vacuum source in your engine; it’s usually a vacuum hose connected to the intake manifold.
- Cut a piece of tubing from the kit to reach from the boost pressure sensor to the vacuum source comfortably.
- Connect one end of the tubing to the back of the boost pressure sensor.
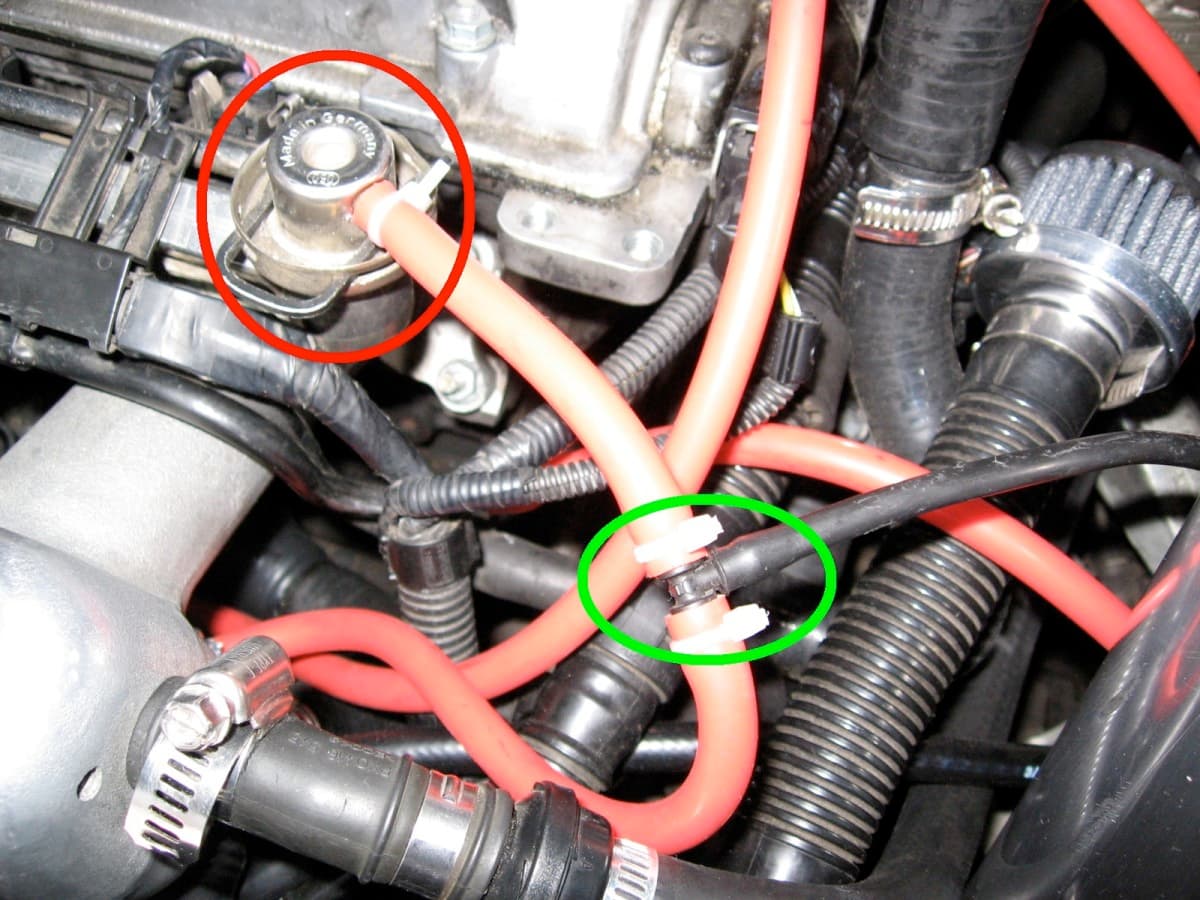
- Attach the other end to the vacuum source on the engine. If needed, use a vacuum tee to connect it to an existing vacuum line.
- Secure all hose connections with hose clamps and ensure the tubing doesn’t kink or bend excessively.
Step 4: Electrical Wiring
It’s time to connect the electrical wiring for the boost pressure sensor. Follow these steps:
- Identify a suitable power source for the sensor’s backlighting; often, it’s the illumination circuit of the instrument panel. Consult your vehicle’s electrical schematic to locate the correct wire.
- Use a wire stripper to expose a small section of the chosen wire.
- Connect the sensor’s backlighting wire to the stripped portion of the chosen wire using a wire tap or connector.
- Secure the connection and cover it with electrical tape.
- Connect the ground wire from the sensor to a clean, unpainted metal surface on your vehicle’s chassis.
Step 5: Testing
Before finalizing the installation, it’s essential to test the boost pressure sensor to ensure it’s functioning correctly:
- Start your car and observe the sensor’s readings. It should accurately display the current boost pressure.
- If the readings don’t match reality, double-check all connections and troubleshoot any issues before proceeding.
Step 6: Reassembly and Final Touches
With the boost pressure sensor functioning correctly, reinstall any panels or trim pieces removed during installation. Make sure the sensor is securely mounted, and all wires and hoses are neatly routed and secured.
By following these steps, you’ll have successfully installed a boost pressure sensor to monitor your turbocharger’s performance. Enjoy your enhanced driving experience with precise boost control!
Summarize
Remember that proper installation and maintenance of the boost sensor is essential for reliable operation. Regularly check for loose connections, kinked tubing and any signs of wear. With the right tools, materials and know-how, you can master supercharger installation and enjoy the benefits of a well-controlled turbocharging system. So why wait? Turbo your knowledge and your car today!